How to connect to an USB camera and display the picture in C#
This example demonstrates in a really simple manner how to connect to a USB camera device with your Windows Forms/WPF Application written in C#. To implement this example, you need to have Ozeki Camera SDK installed, and a reference to OzekiSDK.dll should be added to your Visual Studio project. If you wish to develop a WPF application, you should add System.Drawing.dll to the references from the Framework submenu under the Assemblies tab.
How to connect to a USB camera device using C#?
| Windows Form | WPF |
Windows forms version
Important: you should study this article in order to find out how to setup your Windows Forms Application correctly.
Getting started
To get started it is recomended to Download and Install the latest version of Ozeki Camera SDK. After installation you can find the example code discussed in this page with full source code in the following location on your harddisk:
| Download Ozeki Camera SDK: | https://camera-sdk.com/p_6513-download-onvif-ozeki-camera-sdk-for-c-sharp.html |
| Windows forms version: | C:\Program Files\Ozeki\Ozeki SDK\examples.zip\Examples\Other\Camera_Viewer_Connect_USB_WF\Camera_Viewer_Connect_USB_WF.sln |
To compile this example you will need Microsoft Visual Studio installed on your computer.
To perform the connection to your camera device in C# using the Ozeki Camera SDK, you need to use the classes of the SDK whose objects have been declared at the beginning of the code (in the Form1 class). Then you need to initialize these objects in the constructor of the form. The last 2 lines of the constructor can be used to call the method named SetVideoViewer (which is able to set the basic properties of the video viewer object) and to add your VideoViewerFM object to the control collection.
There are different types of Method calls which can react to the "Connect button pushed" event:
_mediaConnector.Connect(_webCamera, _imageProvider): this method establishes the connection between the image we get from our USB camera and the image provider object that is used to display the camera's image on the graphical user interface.
_videoViewer.SetImageProvider(_imageProvider): we set the image provider to the video viewer object in order to make the application be able to display the image we get from the USB camera.
_webCamera.Start(): in order to receive image from the camera we need to start this method.
_videoViewer.Start(): in order to display the image on the GUI we need to start this method as well.
USB camera connection example in C#
Form1.cs
using System;
using System.Drawing;
using System.Windows.Forms;
using Ozeki.Media;
using Ozeki.Camera;

namespace VideoCameraViewer01
{
    public partial class Form1 : Form
    {
        private VideoViewerWF _videoViewer;
        private IWebCamera _webCamera;
        private DrawingImageProvider _imageProvider;
        private MediaConnector _mediaConnector;

        public Form1()
        {
            InitializeComponent();

            _videoViewer = new VideoViewerWF();

            _imageProvider = new DrawingImageProvider();
            _mediaConnector = new MediaConnector();

            SetVideoViewer();
            this.Controls.Add(_videoViewer);
        }

        private void connectBtn_Click(object sender, EventArgs e)
        {
            _webCamera = new WebCamera();

            if(_webCamera != null)
            {
                _mediaConnector.Connect(_webCamera.VideoChannel, _imageProvider);
                _videoViewer.SetImageProvider(_imageProvider);
                _webCamera.Start();
                _videoViewer.Start();
            }
        }

        private void SetVideoViewer()
        {
            _videoViewer.Location = new Point(10, 10);
            _videoViewer.Size = new Size(250, 200);
            _videoViewer.BackColor = Color.Black;
            _videoViewer.TabStop = false;
        }
    }
}
Code 1 - USB camera connection example in C#
Please note that none of the cancel and disconnect methods are included in the example because of the demonstrating intent and briefness of the article.
GUI

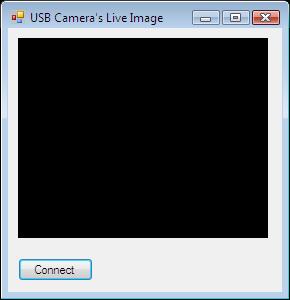
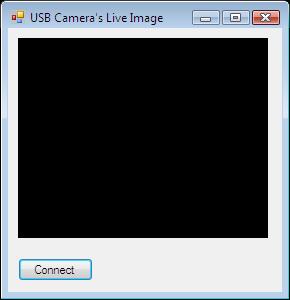
Figure 1 - The graphical user interface of your application
After the successful implementation of the functions and the GUI elements, the application will work properly. By pressing the connect button the image of the USB camera will be loaded in.
If the application does not receive any images from the camera we advise you the following:
- Check whether your device is connected to your PC properly,
- Check your device's physical condition (there maybe damage on the device or on its cable),
- Try to connect your device to another USB port,
- Check whether your camera's driver has been installed properly,
- if the problem still consists you should try the application with another camera device.
The code for the GUI layout can be seen below:
Form1.Designer.cs
	namespace VideoCameraViewer01
{
    partial class Form1
    {
        private System.ComponentModel.IContainer components = null;

        protected override void Dispose(bool disposing)
        {
            if (disposing && (components != null))
            {
                components.Dispose();
            }
            base.Dispose(disposing);
        }

        private void InitializeComponent()
        {
            this.connectBtn = new System.Windows.Forms.Button();
            this.SuspendLayout();
            //
            // connectBtn
            //
            this.connectBtn.Location = new System.Drawing.Point(10, 230);
            this.connectBtn.Name = "connectBtn";
            this.connectBtn.Size = new System.Drawing.Size(75, 23);
            this.connectBtn.TabIndex = 1;
            this.connectBtn.Text = "Connect";
            this.connectBtn.UseVisualStyleBackColor = true;
            this.connectBtn.Click += new System.EventHandler(this.connectBtn_Click);
            //
            // Form1
            //
            this.AutoScaleDimensions = new System.Drawing.SizeF(6F, 13F);
            this.AutoScaleMode = System.Windows.Forms.AutoScaleMode.Font;
            this.ClientSize = new System.Drawing.Size(274, 264);
            this.Controls.Add(this.connectBtn);
            this.Name = "Form1";
            this.StartPosition = System.Windows.Forms.FormStartPosition.CenterScreen;
            this.Text = "USB Camera\'s Live Image";
            this.ResumeLayout(false);
        }

        private System.Windows.Forms.Button connectBtn;
    }
}
Code 2 - GUI example in C#
WPF version
Important: you should study this article in order to find out how to setup your WPF Application correctly.
Getting started
To get started it is recomended to Download and Install the latest version of Ozeki Camera SDK. After installation you can find the example code discussed in this page with full source code in the following location on your harddisk:
| Download Ozeki Camera SDK: | https://camera-sdk.com/p_6513-download-onvif-ozeki-camera-sdk-for-c-sharp.html |
| WPF version: | C:\Program Files\Ozeki\Ozeki SDK\examples.zip\Examples\Other\Camera_Viewer_Connect_USB_WPF\Camera_Viewer_Connect_USB_WPF.sln |
To compile this example you will need Microsoft Visual Studio installed on your computer.
To perform the connection to your camera device in C# using the Ozeki Camera SDK, you need to use the classes of the SDK whose objects have been declared at the beginning of the code (in the MainWindow class). Then you need to initialize these objects in the constructor of the window.
There are different types of Method calls which can react to the "Connect button pushed" event:
_mediaConnector.Connect(_webCamera, _drawingImageProvider): this method establishes the connection between the image we get from our USB camera and the drawing image provider object that is used to display the camera's image on the graphical user interface.
videoViewer.SetImageProvider(_drawingImageProvider): we set the drawing image provider to the video viewer object in order to make the application be able to display the image we get from the USB camera.
_webCamera.Start(): in order to receive image from the camera we need to start this method.
videoViewer.Start(): in order to display the image on the GUI we need to start this method as well.
USB camera connection example in C#
MainWindow.xaml.cs
using System.Windows;
using Ozeki.Media;
using Ozeki.Camera;

namespace VideoCameraViewer01Wpf
{
    public partial class MainWindow : Window
    {
        private IWebCamera _webCamera;
        private DrawingImageProvider _drawingImageProvider;
        private MediaConnector _mediaConnector;

        public MainWindow()
        {
            InitializeComponent();

            _webCamera = new WebCamera();
            _drawingImageProvider = new DrawingImageProvider();
            _mediaConnector = new MediaConnector();
        }

        private void Connect_Click(object sender, RoutedEventArgs e)
        {
            _mediaConnector.Connect(_webCamera.VideoChannel, _drawingImageProvider);
            videoViewer.SetImageProvider(_drawingImageProvider);
            _webCamera.Start();
            videoViewer.Start();
        }
    }
}
Code 1 - USB camera connection example in C#
Please note that none of the cancel and disconnect methods are included in the example because of the demonstrating intent and briefness of the article.
GUI

After the successful implementation of the functions and the GUI elements, the application will work properly. By pressing the connect button the image of the USB camera will be loaded in.
If the application does not receive image from the camera we advise you the following:
- check whether your device has been connected to your PC properly,
- check your device's physical condition (isn't there maybe any damage on the device or on its cable),
- try to connect your device to another USB port,
- check whether your camera's driver has been installed properly,
- if the problem still consists you should try the application with another camera device.
The code to the GUI layout can be seen below:
MainWindow.xaml
	<Window x:Class="VideoCameraViewer01Wpf.MainWindow"
        xmlns="http://schemas.microsoft.com/winfx/2006/xaml/presentation"
        xmlns:x="http://schemas.microsoft.com/winfx/2006/xaml"
        xmlns:controls="clr-namespace:Ozeki.Media;assembly=OzekiSDK"
        Title="MainWindow" Height="350" Width="340">
    <Grid>
        <GroupBox Header="Live camera" HorizontalAlignment="Left" Margin="10,10,0,0" VerticalAlignment="Top" Height="226" Width="308">
            <Grid HorizontalAlignment="Left" Height="204" VerticalAlignment="Top" Width="296">
                <controls:VideoViewerWPF Name="videoViewer" HorizontalAlignment="Stretch" VerticalAlignment="Stretch" Background="Black"/>
            </Grid>
        </GroupBox>
        <Button Content="Connect" HorizontalAlignment="Left" Margin="10,241,0,0" VerticalAlignment="Top" Width="75" RenderTransformOrigin="-0.107,-0.364" Click="Connect_Click"/>
    </Grid>
</Window>
DISCLAIMER: Please note that the following features will only work if your IP camera supports the given function. You should check the user manual of your IP camera to make sure it supports the feature that you wish to implement in C#.
Related Pages
FAQ
Below you can find the answers for the most frequently asked questions related to this topic:
-
I have not managed to build the solution. How to solve it?
- Please set the Target framework property of the project to .NET 4.0.
- You should add the OzekiSDK.dll and System.Drawing.dll to the references of the solution.
- Please import the missing classes.
-
What's the difference among USB camera, RTSP camera and ONVIF camera?
In the case of USB camera we do not need camera url and some functions (like moving and zooming) are not available. In the case of RTSP camera and ONVIF camera there are more available functions. The difference between the RTSP camera and the ONVIF camera is that while the RTSP camera can have only one stream at a time, the ONVIF camera can have multiple ones.
