Jitter effect
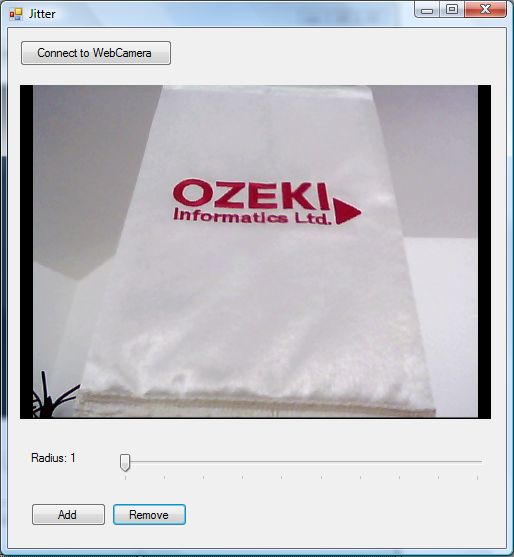
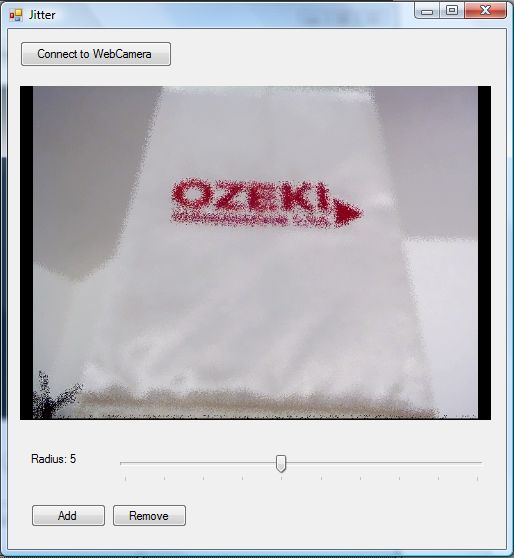
This method places grains onto an image, which result in the image will look like it was jammed by electromagnetic interference. It is useful for simulating quality drop in preparation of any future effect and you can also use it to create an artifical quality drop for e.g. a safe opening or transaction to make it impossible to record sensitive data.
Important: you should study this article in order to find out how to setup your Windows Forms Application correctly.
Properties
Radius: It is a float type property that we can use to set the value of radius between 1 and 10. Raising or lowering the value causes changes in the radius of the grains.


| Windows Form |
Windows forms version
MainForm.cs
using System;
using System.Windows.Forms;
using Ozeki.Camera;
using Ozeki.Media;

namespace ImageManipulation_WF
{
    public partial class MainForm : Form
    {
        private ICamera _camera;
        private DrawingImageProvider _imageProvider;
        private MediaConnector _connector;

        private ImageManipulation _manipulation;
        private OzJitter _filter;

        public MainForm()
        {
            InitializeComponent();

            _connector = new MediaConnector();
            _imageProvider = new DrawingImageProvider();
            // Create video viewer UI control

            // Bind the camera image to the UI control
            videoViewer.SetImageProvider(_imageProvider);

            _manipulation = new ImageManipulation();
            _manipulation.Start();

            _filter = new OzJitter();
        }

        private void btn_Connect_Click(object sender, EventArgs e)
        {
            _camera = new WebCamera();

            if (_camera == null) return;

            _connector.Connect(_camera.VideoChannel, _manipulation);
            _connector.Connect(_manipulation, _imageProvider);

            _camera.Start();
            videoViewer.Start();
        }

        private void btn_Add_Click(object sender, EventArgs e)
        {
            _manipulation.Add(_filter);
        }

        private void btn_Remove_Click(object sender, EventArgs e)
        {
            _manipulation.Remove(_filter);
        }

        private void factorTrack_Scroll(object sender, EventArgs e)
        {
            var trackBar = sender as TrackBar;
            if (trackBar != null)
            {
                var value = trackBar.Value;
                _filter.Radius = value;
                lb_Level.Text = @"Radius: " + value;

            }
        }
    }
}
Code 1 Jitter effect in C#
GUI
Windows forms version
MainForm.Designer.cs
namespace ImageManipulation_WF
{
    partial class MainForm
    {
        ///
        /// Required designer variable.
        ///
        private System.ComponentModel.IContainer components = null;

        ///
        /// Clean up any resources being used.
        ///
        /// true if managed resources should be disposed; otherwise, false.
        protected override void Dispose(bool disposing)
        {
            if (disposing && (components != null))
            {
                components.Dispose();
            }
            base.Dispose(disposing);
        }

        #region Windows Form Designer generated code

        ///
        /// Required method for Designer support - do not modify
        /// the contents of this method with the code editor.
        ///
        private void InitializeComponent()
        {
            this.videoViewer = new Ozeki.Media.VideoViewerWF();
            this.btn_Connect = new System.Windows.Forms.Button();
            this.btn_Remove = new System.Windows.Forms.Button();
            this.btn_Add = new System.Windows.Forms.Button();
            this.lb_Level = new System.Windows.Forms.Label();
            this.trackBar = new System.Windows.Forms.TrackBar();
            ((System.ComponentModel.ISupportInitialize)(this.trackBar)).BeginInit();
            this.SuspendLayout();
            //
            // videoViewer
            //
            this.videoViewer.BackColor = System.Drawing.Color.Black;
            this.videoViewer.FlipMode = Ozeki.Media.FlipMode.None;
            this.videoViewer.FrameStretch = Ozeki.Media.FrameStretch.Uniform;
            this.videoViewer.FullScreenEnabled = true;
            this.videoViewer.Location = new System.Drawing.Point(12, 57);
            this.videoViewer.Name = "videoViewer";
            this.videoViewer.RotateAngle = 0;
            this.videoViewer.Size = new System.Drawing.Size(471, 334);
            this.videoViewer.TabIndex = 0;
            this.videoViewer.Text = "videoViewerWF1";
            //
            // btn_Connect
            //
            this.btn_Connect.Location = new System.Drawing.Point(12, 12);
            this.btn_Connect.Name = "btn_Connect";
            this.btn_Connect.Size = new System.Drawing.Size(152, 26);
            this.btn_Connect.TabIndex = 14;
            this.btn_Connect.Text = "Connect to WebCamera";
            this.btn_Connect.UseVisualStyleBackColor = true;
            this.btn_Connect.Click += new System.EventHandler(this.btn_Connect_Click);
            //
            // btn_Remove
            //
            this.btn_Remove.Location = new System.Drawing.Point(104, 475);
            this.btn_Remove.Name = "btn_Remove";
            this.btn_Remove.Size = new System.Drawing.Size(75, 23);
            this.btn_Remove.TabIndex = 1;
            this.btn_Remove.Text = "Remove";
            this.btn_Remove.UseVisualStyleBackColor = true;
            this.btn_Remove.Click += new System.EventHandler(this.btn_Remove_Click);
            //
            // btn_Add
            //
            this.btn_Add.Location = new System.Drawing.Point(23, 475);
            this.btn_Add.Name = "btn_Add";
            this.btn_Add.Size = new System.Drawing.Size(75, 23);
            this.btn_Add.TabIndex = 0;
            this.btn_Add.Text = "Add";
            this.btn_Add.UseVisualStyleBackColor = true;
            this.btn_Add.Click += new System.EventHandler(this.btn_Add_Click);
            //
            // lb_Level
            //
            this.lb_Level.AutoSize = true;
            this.lb_Level.Location = new System.Drawing.Point(20, 423);
            this.lb_Level.Name = "lb_Level";
            this.lb_Level.Size = new System.Drawing.Size(40, 13);
            this.lb_Level.TabIndex = 15;
            this.lb_Level.Text = "Radius";
            //
            // trackBar
            //
            this.trackBar.Location = new System.Drawing.Point(104, 423);
            this.trackBar.Minimum = 1;
            this.trackBar.Name = "trackBar";
            this.trackBar.Size = new System.Drawing.Size(379, 45);
            this.trackBar.TabIndex = 16;
            this.trackBar.Value = 1;
            this.trackBar.Scroll += new System.EventHandler(this.factorTrack_Scroll);
            //
            // MainForm
            //
            this.AutoScaleDimensions = new System.Drawing.SizeF(6F, 13F);
            this.AutoScaleMode = System.Windows.Forms.AutoScaleMode.Font;
            this.ClientSize = new System.Drawing.Size(498, 520);
            this.Controls.Add(this.trackBar);
            this.Controls.Add(this.lb_Level);
            this.Controls.Add(this.btn_Remove);
            this.Controls.Add(this.btn_Add);
            this.Controls.Add(this.btn_Connect);
            this.Controls.Add(this.videoViewer);
            this.Name = "MainForm";
            this.Text = "Jitter";
            ((System.ComponentModel.ISupportInitialize)(this.trackBar)).EndInit();
            this.ResumeLayout(false);
            this.PerformLayout();

        }

        #endregion

        private Ozeki.Media.VideoViewerWF videoViewer;
        private System.Windows.Forms.Button btn_Connect;
        private System.Windows.Forms.Button btn_Remove;
        private System.Windows.Forms.Button btn_Add;
        private System.Windows.Forms.Label lb_Level;
        private System.Windows.Forms.TrackBar trackBar;
    }
}
Code 2 Jitter effect GUI in C#
Related Pages
Conclusion
With the help of this lecture you can successfully implement jitter effect with your C# camera application using the Ozeki Camera SDK.
FAQ
Below you can find the answers for the most frequently asked questions related to this topic:
-
What kind of developer environment is needed?
- Microsoft Visual Studio 2010
- Microsoft .Net Framework 4.0
- Internet connection
-
How can I get the URL of the camera?
You can get the URL from the producer of the camera.
-
I have not managed to build the solution. How to solve it?
- Please set the Target framework property of the project to .NET 4.0.
- You should add the OzekiSDK.dll to the references of the solution.
- Please import the missing classes.
