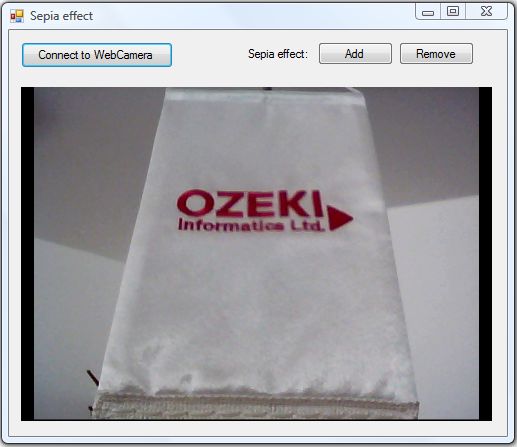
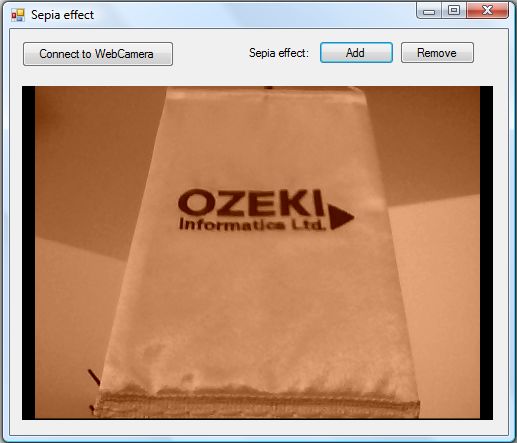
Sepia effect
Sepia is a reddish-brown color, named after the rich brown pigment derived from the ink sac of the common cuttlefish Sepia. By using sepia you can have a unique colored image which gives a warm, antique feeling to the picture. It is very often used by photographers to reproduce the colors which can be seen on old photos.
Important: you should study this article in order to find out how to setup your Windows Forms Application correctly.


| Windows Form |
Windows forms version
MainForm.cs
using System;
using System.Windows.Forms;
using Ozeki.Camera;
using Ozeki.Media;

namespace ImageManipulation_WF
{
    public partial class MainForm : Form
    {
        private ICamera _camera;
        private DrawingImageProvider _imageProvider;
        private MediaConnector _connector;

        private ImageManipulation _manipulation;
        private OzSepia _filter;

        public MainForm()
        {
            InitializeComponent();

            _connector = new MediaConnector();
            _imageProvider = new DrawingImageProvider();
            // Create video viewer UI control

            // Bind the camera image to the UI control
            videoViewer.SetImageProvider(_imageProvider);

            _manipulation = new ImageManipulation();
            _manipulation.Start();

            _filter = new OzSepia();
        }

        private void btn_Connect_Click(object sender, EventArgs e)
        {
            _camera = new WebCamera();

            if (_camera == null) return;

            _connector.Connect(_camera.VideoChannel, _manipulation);
            _connector.Connect(_manipulation, _imageProvider);

            _camera.Start();
            videoViewer.Start();
        }

        private void btn_Add_Click(object sender, EventArgs e)
        {
            _manipulation.Add(_filter);
        }

        private void btn_Remove_Click(object sender, EventArgs e)
        {
            _manipulation.Remove(_filter);
        }
    }
}
Code 1 Sepia effect in C#
GUI
Windows forms version
MainForm.Designer.cs
namespace ImageManipulation_WF
{
    partial class MainForm
    {
        ///
        /// Required designer variable.
        ///
        private System.ComponentModel.IContainer components = null;

        ///
        /// Clean up any resources being used.
        ///
        /// true if managed resources should be disposed; otherwise, false.
        protected override void Dispose(bool disposing)
        {
            if (disposing && (components != null))
            {
                components.Dispose();
            }
            base.Dispose(disposing);
        }

        #region Windows Form Designer generated code

        ///
        /// Required method for Designer support - do not modify
        /// the contents of this method with the code editor.
        ///
        private void InitializeComponent()
        {
            this.videoViewer = new Ozeki.Media.VideoViewerWF();
            this.btn_Connect = new System.Windows.Forms.Button();
            this.btn_Remove = new System.Windows.Forms.Button();
            this.btn_Add = new System.Windows.Forms.Button();
            this.label1 = new System.Windows.Forms.Label();
            this.SuspendLayout();
            //
            // videoViewer
            //
            this.videoViewer.BackColor = System.Drawing.Color.Black;
            this.videoViewer.FlipMode = Ozeki.Media.FlipMode.None;
            this.videoViewer.FrameStretch = Ozeki.Media.FrameStretch.Uniform;
            this.videoViewer.FullScreenEnabled = true;
            this.videoViewer.Location = new System.Drawing.Point(12, 57);
            this.videoViewer.Name = "videoViewer";
            this.videoViewer.RotateAngle = 0;
            this.videoViewer.Size = new System.Drawing.Size(471, 334);
            this.videoViewer.TabIndex = 0;
            this.videoViewer.Text = "videoViewerWF1";
            //
            // btn_Connect
            //
            this.btn_Connect.Location = new System.Drawing.Point(12, 12);
            this.btn_Connect.Name = "btn_Connect";
            this.btn_Connect.Size = new System.Drawing.Size(152, 26);
            this.btn_Connect.TabIndex = 14;
            this.btn_Connect.Text = "Connect to WebCamera";
            this.btn_Connect.UseVisualStyleBackColor = true;
            this.btn_Connect.Click += new System.EventHandler(this.btn_Connect_Click);
            //
            // btn_Remove
            //
            this.btn_Remove.Location = new System.Drawing.Point(390, 12);
            this.btn_Remove.Name = "btn_Remove";
            this.btn_Remove.Size = new System.Drawing.Size(75, 23);
            this.btn_Remove.TabIndex = 1;
            this.btn_Remove.Text = "Remove";
            this.btn_Remove.UseVisualStyleBackColor = true;
            this.btn_Remove.Click += new System.EventHandler(this.btn_Remove_Click);
            //
            // btn_Add
            //
            this.btn_Add.Location = new System.Drawing.Point(309, 12);
            this.btn_Add.Name = "btn_Add";
            this.btn_Add.Size = new System.Drawing.Size(75, 23);
            this.btn_Add.TabIndex = 0;
            this.btn_Add.Text = "Add";
            this.btn_Add.UseVisualStyleBackColor = true;
            this.btn_Add.Click += new System.EventHandler(this.btn_Add_Click);
            //
            // label1
            //
            this.label1.AutoSize = true;
            this.label1.Location = new System.Drawing.Point(236, 17);
            this.label1.Name = "label1";
            this.label1.Size = new System.Drawing.Size(67, 13);
            this.label1.TabIndex = 15;
            this.label1.Text = "Sepia effect:";
            //
            // MainForm
            //
            this.AutoScaleDimensions = new System.Drawing.SizeF(6F, 13F);
            this.AutoScaleMode = System.Windows.Forms.AutoScaleMode.Font;
            this.ClientSize = new System.Drawing.Size(498, 406);
            this.Controls.Add(this.label1);
            this.Controls.Add(this.btn_Remove);
            this.Controls.Add(this.btn_Add);
            this.Controls.Add(this.btn_Connect);
            this.Controls.Add(this.videoViewer);
            this.Name = "MainForm";
            this.Text = "Sepia effect";
            this.ResumeLayout(false);
            this.PerformLayout();

        }

        #endregion

        private Ozeki.Media.VideoViewerWF videoViewer;
        private System.Windows.Forms.Button btn_Connect;
        private System.Windows.Forms.Button btn_Remove;
        private System.Windows.Forms.Button btn_Add;
        private System.Windows.Forms.Label label1;
    }
}
Code 2 Sepia effect GUI in C#
Related Pages
Conclusion
With the help of this lecture you can successfully implement sepia effect with your C# camera application using the Ozeki Camera SDK.
FAQ
Below you can find the answers for the most frequently asked questions related to this topic:
-
What kind of developer environment is needed?
- Microsoft Visual Studio 2010
- Microsoft .Net Framework 4.0
- Internet connection
-
How can I get the URL of the camera?
You can get the URL from the producer of the camera.
-
I have not managed to build the solution. How to solve it?
- Please set the Target framework property of the project to .NET 4.0.
- You should add the OzekiSDK.dll to the references of the solution.
- Please import the missing classes.
